

As I said yesterday, the globe I represented in “Blue Levitating Marble” scene is based on a very detailed Andrew Price’s tutorial; you can find it here.
I introduced some changes to materials described in the tutorial: particularly I modified the atmosphere because it had a sharp profile, to optimize the render time; so I decided to create a more realistic fading edge.


Let’s start creating a new material and assign it to the atmosphere sphere; delete diffuse node and add an emitter node and connect it to Volume output.

To create a fading profile we need a spherical gradient node; we also need to create a nodes chain to control correct position, fading and global strenght; below the complete nodes chain.

Now turn on the earth and let’s see the final result.

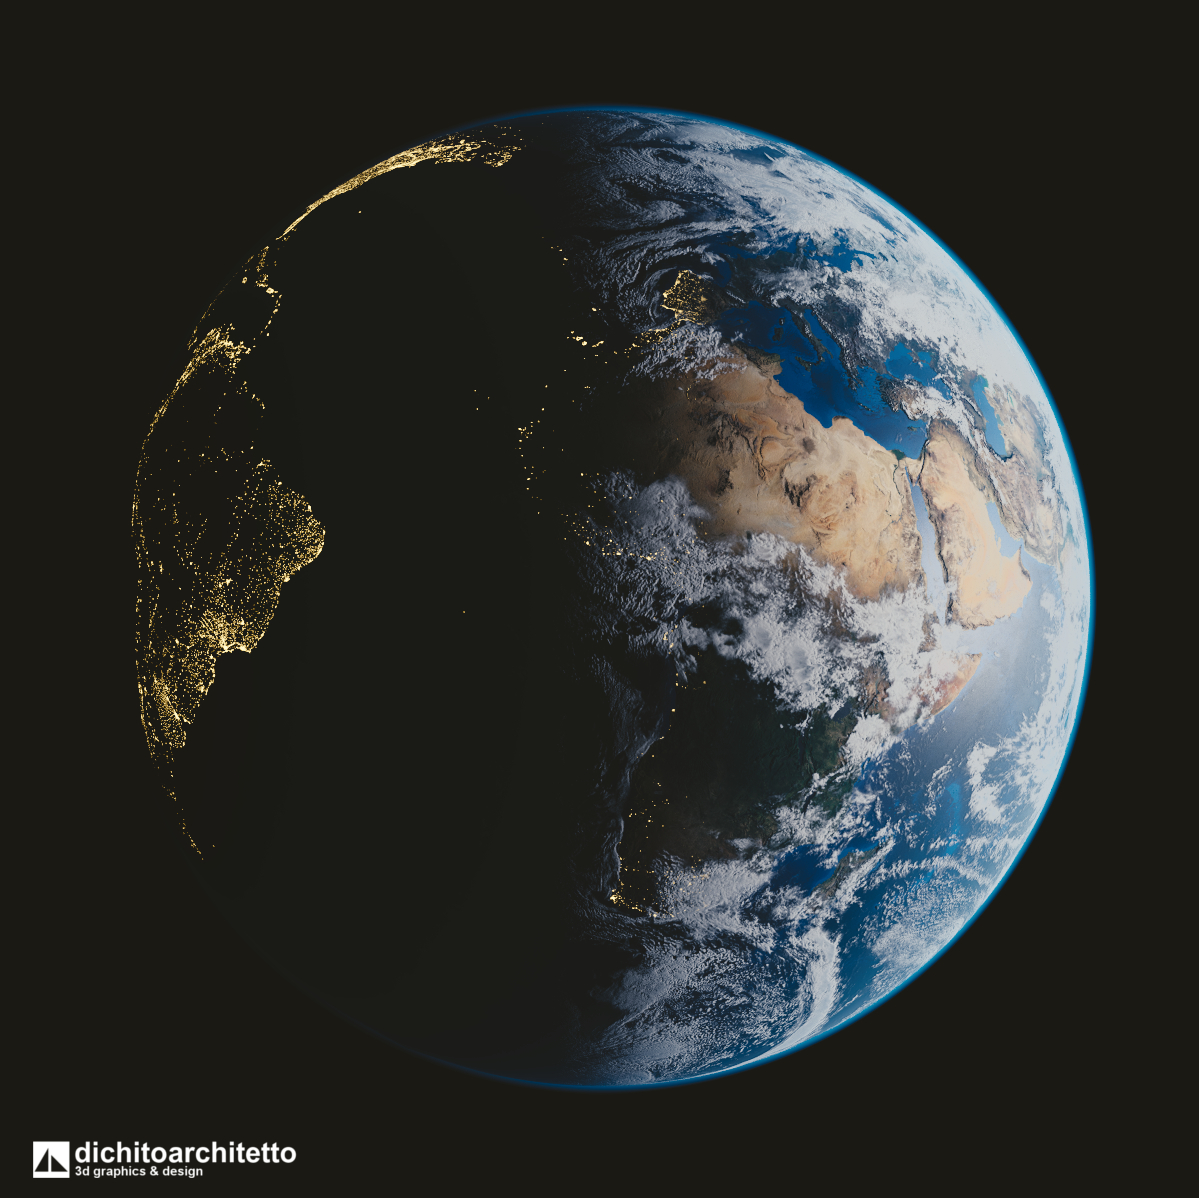
Mmm… on the right illuminated part, we have a good result; on the left the result is unreal (the atmosphere isn’t illuminated and should be almost invisible); this appens because we used an emitter node.
After several attempts, I obteined a good result using a linear gradient node; with this node we can control the fading of the entire atmosphere; below the complete nodes chain.
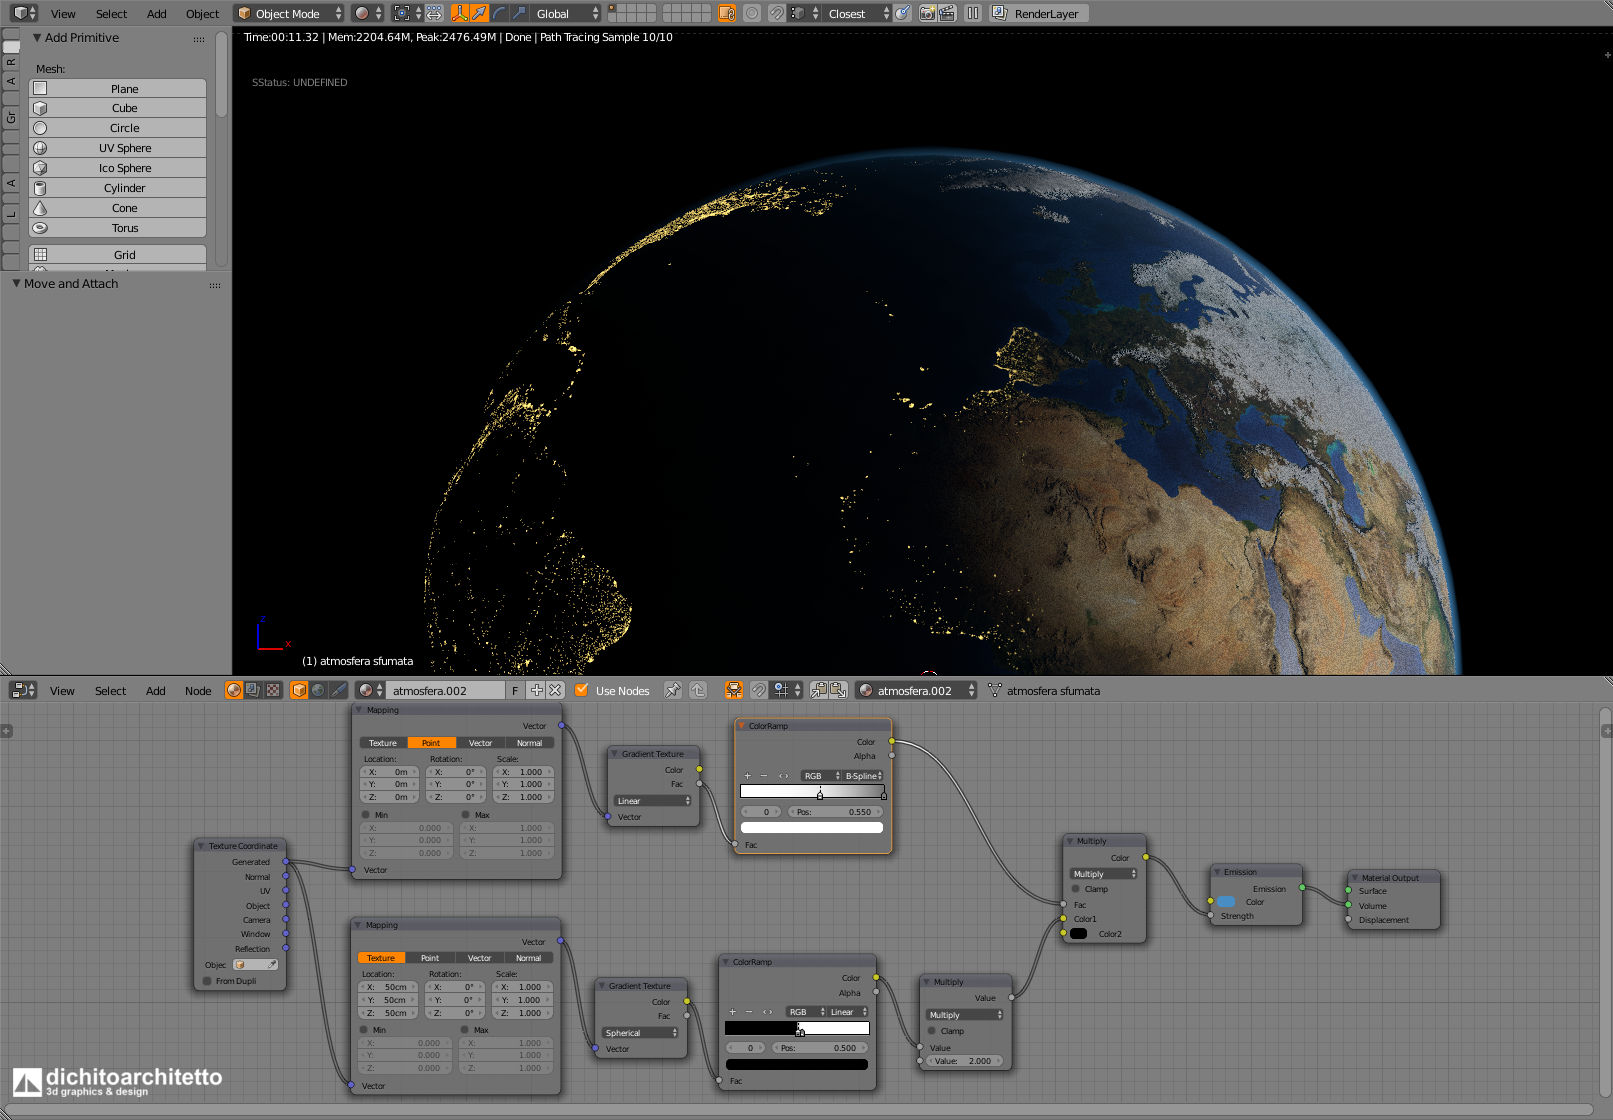
To make the result even more realistic, I modified the Earth material, to increase bluish effect on globe border; to do that, mix atmosphere blue color with Earth diffuse texture, and use layer weight as mix factor; below the nodes chain.

I prepared this gif image to see better this subtle difference.

This trick can be applied to clouds material.
Last thing to do, “parent” (Ctrl+P) the atmosphere to the sun: it will follow the rotation of the lamp.

And now, final rendering.


